So, you are ready to build your own PC so you can get everything you need for your gaming. So, where in the heck do you start with a black and white PC build? Today we are going to take a look at a simple build, with all of the steps are laid out so you can understand them easily. Even though your computer may look a bit different, it will have similar functionality, which is the most important thing. Let’s get started.
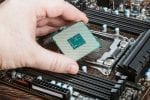
Step 1: Install CPU
The first step in the process is to remove the motherboard from the anti-static sleeve, and set it on a flat surface. Take the protective plastic off the CPU socket on the motherboard, and the processor is now ready to install. Open the CPU box, and remove the processor. There is only one way to install the CPU. The arrow located on the bottom left corner of the chip should line up with the socket, at the bottom corner. It will fit into place without the need to press down or apply any force. Once the chip is in place, lower the covering of the socket and shift the lever arm back where it should be.
Step 2: Install M.2 SSD’s
If you are planning on using an M.2 SSD, now is the time to install it. It can be done later, but it is easier to do it while the motherboard is sitting right in front of you. Some motherboards have an M.2 slot cooler, but this isn’t necessary if you do not have one. If there are multiple OS drive options, use the first M.2 slot. If you need a lot of storage, we recommend using a second M.2 drive.
Step 3: Put I/O Shield in Place
Next you will need to open the PC case, which should be as simple as loosening the thumbscrews, which are located at the back. Remove the screws and panels, and lay the case down so the main area is facing you. Most motherboards come with a I/O shield that fits over the input/output ports, and some have the I/O shield fixed in place. Place the I/O shield into the rectangular slot, which is located at the rear of the case. Press firmly against each side, as this can be a bit difficult to install, until you hear a snap.
Step 4: Install Motherboard Standoffs
Next, you will need to dig out that package of screws, zip-ties, and other small parts that you need for the installation. Look for the motherboard standoffs, which are usually gold with threaded bottom halves and screw holes at the top. You will also need to dig out the screws for the standoffs to hold the motherboard in place. Look at the case, and you will see a dozen or so small holes. These are where you will screw in the standoffs. In some cases, these are labeled for various size motherboards.
Once you have the standoffs where they should be, screw in the motherboard. Make sure the I/O ports are lined up with the I/O shield. Lower the motherboard in place until it is sitting on the standoffs. If your case has a peg that goes into a hole in the motherboard, you will know that the installation was done properly. Install the screws and tighten them.
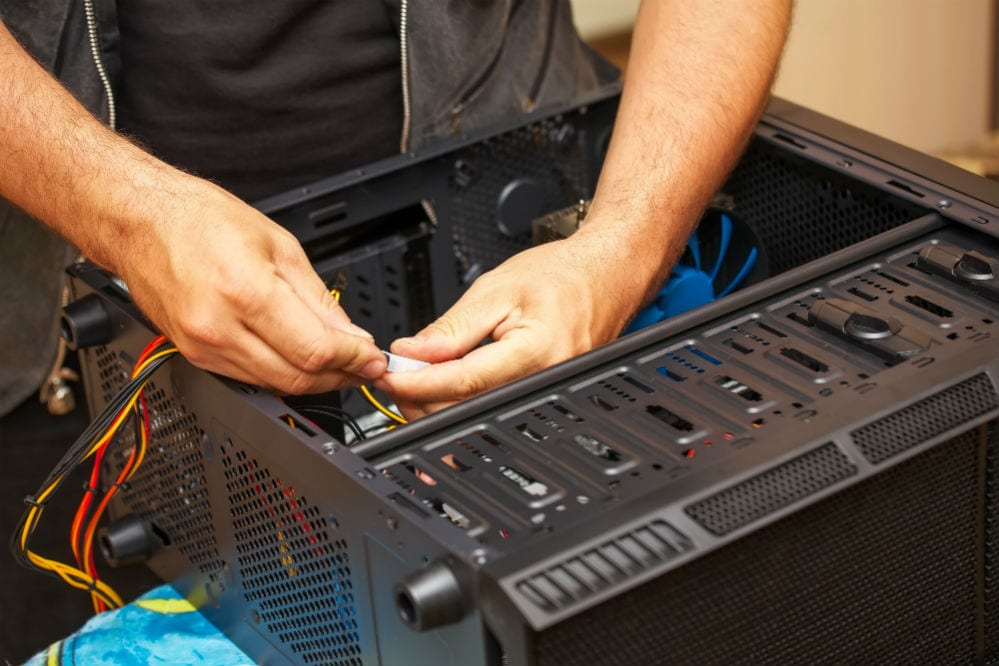
Step 5: Connect Case Wires to Motherboard
Here is one of the most difficult parts of the whole process, especially for first timers. There are many connections that go from the motherboard to the case, as well as many cables for these connections. This is where your motherboard manual is going to come in really handy. Look for the section about front panel connectors. All cases have a power switch, as well as a reset switch. Next, look for the cables inside the case. The great thing here is that because they all have different connectors that are labeled, there is no way you can’t install them properly.
The difficult parts are the reset, power, and LED connections, because they are super-small. It is important that you properly match the ground and power connectors with the right pins. LED leads must be installed the right way, of there will be no lights. Keep in mind that white cables are negative (ground) and colored cables are positive.
Step 6: Installing the Power Supply (PSU)
Take the power supply and cables out of the box. Some cases give you the option to have the power supply facing up or down (up is better, because the fan needs airflow). Basically, you will be putting the PSU inside the case, near the bottom and the rear vent. Connect it in place using the power supply screws, making sure they are screwed in tightly. Use the thumbscrews in the case to make sure the mounting bracket is secured.
Here is a detailed video on how to install a power supply.
Step 7: Connect Power to Fans and Motherboard
Now it is time to connect the power to the motherboard and fans. The 24-pin ATX cable will need to go to the appropriate space, preferably behind the motherboard tray. You may or may not need to connect the fan to the motherboard, depending on whether or not your case already consists of a built-in fan that are already wired.
Conclusion
These are the main steps to a basic black and white PC build. Of course, there are a few more steps, including installing the CPU AIO cooler, adding RAM, installing hard drives, and SATA SSD’s, and inserting the graphics card. Now all that’s left is to clean things up, turn the power on, do the BIOS updates, and any troubleshooting to make sure that everything is properly installed so you can begin gaming on your new gaming PC.